Thursday, March 26, 2015

Review: Anastasia Beverly Hills Contour Cream Kit

Sorry, I forgot to take a picture of the kit before I used it. Hope you don't mind too much!

   
Okay, So I recently purchased the Anastasia Contour kit, and here are my thoughts:

Pros:
1. It's compact which makes it very easy to carry either in your kit or if you're just traveling.
2. Although the colors are very pigmented, once applied to the face it doesn't cake up. You get a very thin layer which makes it very comfortable to wear.
3. The darker colors are pretty blendable which is great because those are the ones you really don't want to look blotchy.
4. I LOVE 'Cream' in this palette which is the second color in the top row. 

Cons:
1. So lately I've been having dry patches and these weird skin tags have come up on my skin so that's annoying, but because of that, this palette just brings those flaws out so much more. So I definitely would not recommend this for people with dry skin.
2. I really don't care for the consistency of it. I love the fact that you get a thin layer and it isn't super high coverage because it's not a concealer palette. But the way it dries just makes me uncomfortable sometimes, because it has a powdery finish in my opinion. So if you haven't set it with a powder and you touch your face, you'll see a nice little finger print on your face.
3. I do not like the Banana shade in this palette, it looks really ashy on me, so I'm glad cream was in here.


Left to Right: Banana, Cream, Warm Coral, Nude, Cinnamon, and Chocolate.

SO! In conclusion, I am not overly enthused by this product. I probably won't buy any of the other colors for my kit. I also think I'm a bit biased because my skin isn't at it's best and this palette has been making it look so much worse. So if you have clear smooth skin then yes buy this palette because it will glide on wonderfully. But if you have skin like mine that just won't clear up then I would recommend to use a lighter and darker foundation if you want to do some cream contouring and highlighting.

Hope you enjoyed this review and found it helpful!

Tuesday, February 24, 2015

Doll Eyes

So today, I had no idea what look to do, but I saw this picture where the eye shadow was dragged out pretty far and I really liked it. So I decided to try to do something similar.


I used two companies for my eye makeup. I used Provoke eye shadow base by Sigma, which is a soft pinky champagne color and the Lorac Pro palette.
 

So, first I applied Provoke eye shadow base by sigma. This gave the lid a pink undertone. Then I went in with Mauve from the Lorac Pro Palette and this acted as my overall transition color. To deepen the crease further I went in with Taupe, Sable and a little bit of Espresso. Then for the lid I mixed Lt.Pink and Cream. And to get that sharp edge I did use tape on the corners of my eye. For Eyeliner I used the Rimmel Glam eyes liquid liner in Black. Then for mascara I used L'Oreal Telescopic. Lastly for the lashes I applied the style Siren by House of Lashes.

For the lower lash line, I first applied Scandal eyes Kohl Kajal liner in 005 Nude by Rimmel in my water line to make my eyes look a bit bigger. Then I went in with Mauve, Taupe, Sable and Espresso. But I don't go very low with these colors because as you can see I have a lot of wrinkles under my eyes, which I have to work with, so if I go too low with any color it just doesn't look right. But anyway, to finish off the eyes I applied the Clinique bottom lash mascara which comes with the cutest little wand.


FACE:
For the base I used NARS All day luminous Weightless foundation. The I mixed the NARS Radiant creamy concealer in Custard and the Sephora concealer in Mat Tan since Custard is a bit too light for me.

 Here you can see the products I used for my eyes.
 

 FACE:
Now for the rest of my face I used the NARS Matte Multiple in Vientiane as a cream base for my bronzer. Then I went in with the darkest shade (Havana) in the Anastasia Contour kit to set the cream base. Then I used Banana to set the areas I applied my concealer to highlight. For Blush I used a mixture of Infatuation and Bliss by Makeup Geek. And to highlight I used NARS Albatross, only on the high points of my face.


 For my brows I used the Anastasia Brow powder duo in Granite.
 
 And lastly for my lips I used Pure Hollywood by Anastasia Beverly Hills. At first I thought I would need to mix it with another color, but I ended up liking the way it looked on its own.


Thank you for stopping by my page, I hope you like this look. If you have any request let me know! have a great day.

Sunday, February 22, 2015

Heathers

Hello! Sorry it's been so long since the last time I posted anything but I felt inspired for once today. Hope you like the look I created.


I also purchased the new NARS All day Luminous Weightless Foundation, it's only my second time wearing it but I do like it. It definitely is light weight and very comfortable to wear, even for my oily it wears very well throughout the day.
For concealer I used the NARS creamy concealer to highlight and conceal my dark circles.


So I recently purchased the new Liquid Lipsticks from Anastasia Beverly Hills. I really like them so far. They're very pigmented and very comfortable to wear.


I really didn't expect to like this color as much as I do, but it really inspired me to do my makeup today. Personally It reminds me of Diva by MAC on steroids. It's like a super intense version of it. I didn't think Diva could get any better.


For blush: I used Melba blush by MAC
Bronzer: I used a mixture of Benefit Hoola bronzer and Covergirl powder foundation in soft honey to warm up the skin.
Highlight: Becca Shimmering Skin perfector in Moon Stone.


On the eyes I used only the Semi chocolate Bar palette, from that I used:
Nougat as one of my transition colors, over that I used Peanut Butter. For the crease I used Truffled and Hot fudge. And for the lid I used Bon Bon, and for the inner corner I used Coconut Crème.
For eyeliner I used the L'Oreal gel liner in black.
Mascara: Makeup Forever Smoky extravagant mascara in black, it was one of those free gifts from Sephora, and I love the brush applicator so I would definitely purchase the full size.
Eyebrows: I used the Anastasia Duo brow powder in Granite.


I really like how this look came out, hope you did too.

Wednesday, May 7, 2014

Copenhagen


 Hello! Once again I am back months later with another blog update. Today was a rainy day and this look just seemed to fit my mood. Personally, I love rainy days and I love dark makeup so it was a good excuse to wear this look. I was also inspired by a makeup artist on Youtube and Instagram her name is Samantha and she is awesome! You guys should definitely check her out. Her name on instagram is SSSSamanthaa. Anyway, enjoy!

 
So don't mind my shirt, I don't know why my camera made it look that way.
 
 
So for my eyes, I just bought these lashes by House Of Lashes, and I have been trying them out everyday because I'm just so excited about them. I bought I couple different ones. But the ones I'm wearing today are in the style 'Temptress". Clearly they are very bold and long and full, but I love them and they just went with this look so well. Anyway, for the lid I used the Lorac Pro Pallet. I used the color Mauve on the lid, and Espresso and Sable in the crease. For the crease I did exaggerate my eye shape to give it that elongated look. I put these same two colors on my lower lash line and for the inner corner I used "Strange" from the Naked 3 pallet. For mascara I used the Lights camera lashes by Tarte and the Clinique bottom lash mascara, which I have been Loving! And lastly, for eyeliner I used Glam eye professional liquid liner by Rimmel.


So these are the products I used on my face:
Foundation: Kat Von D Lock It Tattoo in M 62
Concealer: Maybelline Fit me in 25 medium to highlight and conceal
Powder: To lock everything in I used the elf high def. powder (translucent powder)
Contour/Highlight: For the contour shade I used the Anastasia Contour kit which is by all means Amaaaaazing. I used the shade Java. And to set the under eye highlight I used the shade Banana.
Primer: Benefit PORE'fessional

 
And these are the products I used on my eyes:
Primer: UD Primer potion in Original
Shadow: Lorac Pro pallet in the shades, Mauve, Sabel and Espresso
Mascara (top/lower): Tarte Lights camera lashes and Clinique Bottom lash mascara
Liner: Glam Eyes by Rimmel
Lash adhesive: House of lashes adhesive


Today I decided to change it up with my brows and use Brun instead of my Anastasia Powder duo. It works just as good and retails for $15 if you don't want to spend $21, I believe it is, for the Anastasia powder. I'm not saying this is a dupe for it, but it gives you nice natural definition for the brows.

 
And lastly the Lips. My favorite part. I used the NYX Soft matte Lip Cream in "Copenhagen" and I sure do love it. The lip liner is in Plum, also by NYX and the two are wonderful together!!! I will say that the Soft matte lip cream does tend to dry out my lips throughout the day. And don't you let it get there because it is not at all subtle. Your lips will look like they have never seen chapstick. But a wonderful color none the less.
 
I hope you have enjoyed this look and learned something new. Have a great day!


Thursday, March 27, 2014

Black Heart

 Hello everyone, I know I haven't posted in a while but I haven't really been feeling too inspired. But I just got the Naked 3 pallet and I knew I had to post something! Enjoy
 
I will list the products below.
 
 
FACE:
Foundation - L'Oreal True match in W-4.5
Concealer - Maybelline Dream Lumi in Nude Chair. And I set that with MAC MSF in Medium Plus
Primer - Benefit PORE'fessional
Bronzer/Contour - I used a combination of NARS Matte Multiple in Vientiane and MAC MSF in Give me sun
Blush - MAC in Coygirl


EYES:
I only used one pallet for this look which is the Naked 3 pallet! I love it, I think it's definitely worth the $52, as it should be! Anyway, I started with Nooner as a transition color but also to define the Crease a bit. Then I went in with BlackHeart to further intensify the crease. And for the Lid I sprayed Buzz with FixPlus to make it pop. Then for Eyeliner I used #77 by Inglot and I cannot say enough good things about this guy. It is the blackest liner I have ever used and super affordable! And lastly for Mascara I used MAC Haute and naughty and for the lower lash line I used Power Volume by L'Oreal which I must say, sucks. It's clumpy and not at all volumizing, it's just poop to say the least. Lol
 
 
EYEBROWS:
For my brows I've been using the Anastasia Brow powder duo in Granite and I have been loving it! It is the perfect color for people with black hair and it is the color I have been looking for because all the ones I had used previously were too light! But if you're looking for a good brow powder Anastasia is the way to go!
 
 
LIPS:
Lip Liner - NYX Plush Red
Lip Stick - MAC Relentlessly Red
Now I will say I don't think this lipstick is worth buying. It's super drying which I knew when I bought it, but I mean seriously. If you're not careful it will make your lips look like they have never seen chapstick a day in their life. But it is a beautiful color!

 I hope you guys enjoyed this look!

Wednesday, January 1, 2014

Shameless

Hello again and welcome to my blog! Today I went with a gold and purple combo and I know I may have done something similar in the past, however this time I paired it with a purple lipstick by Revlon. I am loving this color lately. I find myself reaching for a lot of dark plum colors so this is a nice change for once. And I used the same products as usual for my skin, so if you'd like to know what I used you can check out some of my other posts!
 

Lips:
                          
 
Here is a swatch of Revlon's new color burst lipsticks in Shameless. I absolutely LOVE this color. It's really creamy and it's pretty long lasting. It actually reminds me of Heroine Lipstick by MAC.


EYES:
 
So below is a picture of the pallets I used for this look. The Lorac Pro Pallet and the Urban Decay NYC Pallet.


The colors I used are named from left to right and the steps I took to get this look:
Last Call (UD) I used this under Rockstar more as a transition color so you won't really notice it but it works perfectly because the two purple tones compliment eachother nicely.
Rockstar (UD) I used this darker plum color to define the outer crease. Usually I would use a matte color but using a shimmery color once in a while is a nice change.
Gold (Lorac) This color I used all over the lid. At first when I saw this color it didn't really stand out to me, especially since I have so many golds. But it really is a beautiful color. It's definitely a different gold than I usually use because it's true to its color. Meaning it really is a gold color, it's not pale or rosy it's straight up GOLD. So I really liked the way the three colors complimented eachother. And I especially love how they look with the bold Purple lip.


So, as usual I hope you enjoyed this look!


Thursday, December 12, 2013

Uninterrupted

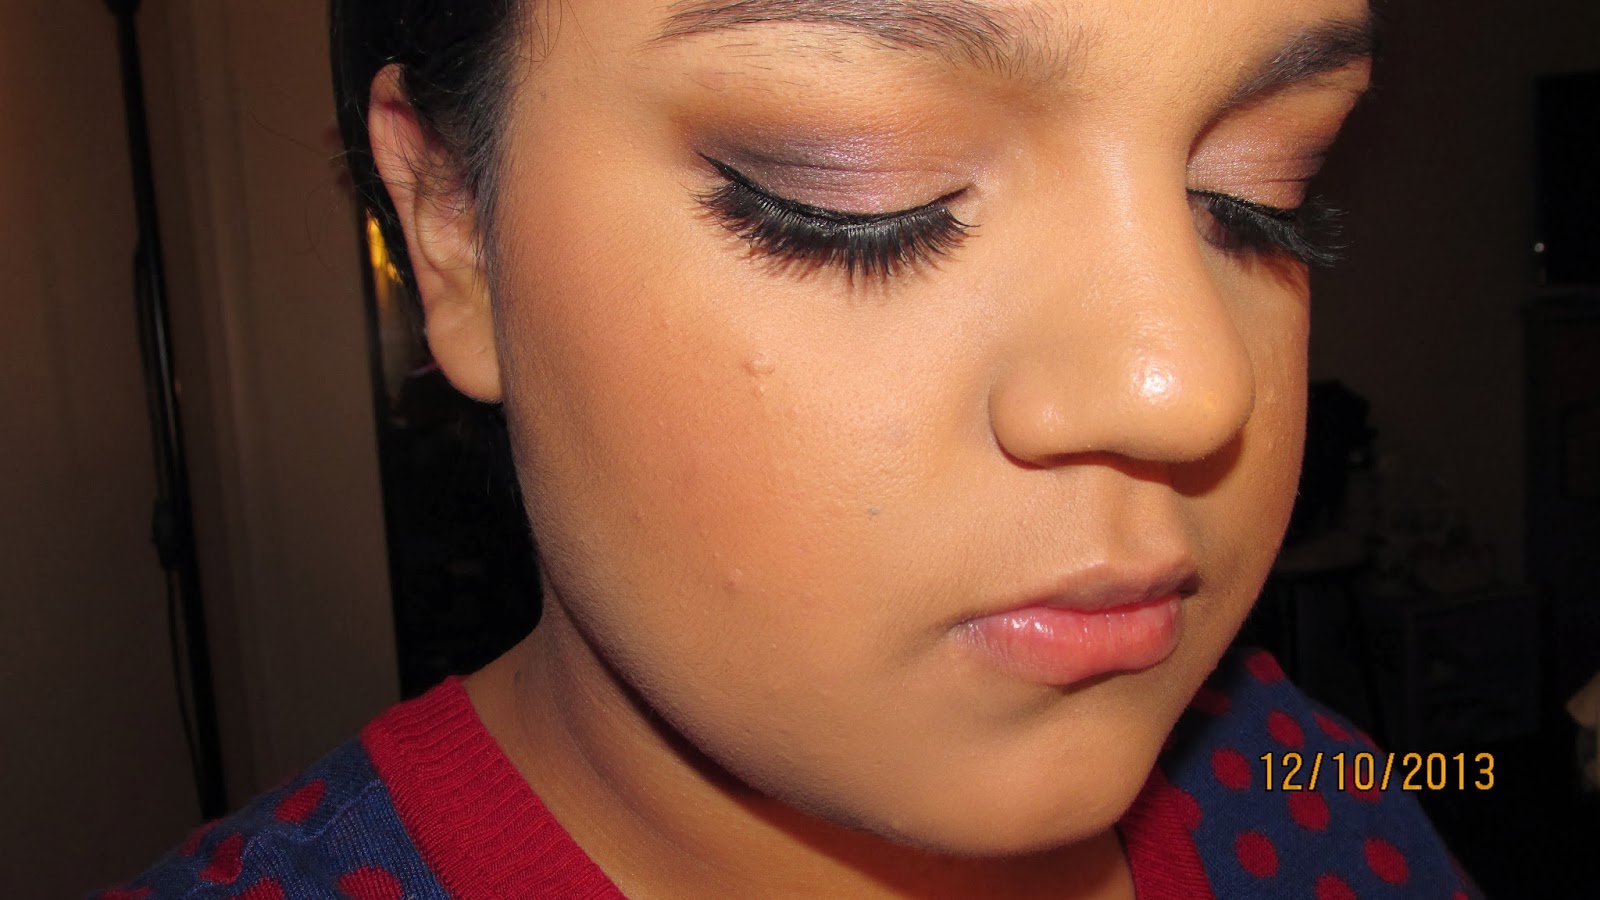
Hello again! I know I know it's been forever sorry BUT I just got a new camera so I'm pretty excited. So yeah, I've actually been doing looks like this pretty often lately and I've been liking it a lot. It gives just enough definition to the eyes. Hope you like it as much as I do!
 
So first I applied Uninterrupted eyeshadow by MAC. This color is just...ugh it is SO pretty! I honestly think it is the perfect transition color of life! It really just ties together any look!
Next, I applied the lid color which is actually a pale rose gold color from my Sephora pallet!
After I applied a deep purple color from my Beloved Lorac Pro pallet, which is actually called "Deep Purple" and after that I applied the Lorac Front of the line pro liner I believe is what it's called.
And lastly I applied Haute and Naughty lash mascara by MAC and applied Red Cherry lashes in #46. It sounds like a lot of steps but honestly it is so simple! Below I will list the products used.


Top: Naked Illuminated (UD) , Kat Von D Lock-it Tattoo Foundation, MAC Prolong wear concealer, Lorac Pro Pallet
Bottom: MAC Give me sun bronzer, MAC Melba blush and lastly NARS Translucent Crystal setting powder
I actually put the highlighting powder afterwards and forgot to take a picture with it on..sorry lol I will definitely wear it in my next post.


And here is a close up of Uninterrupted eye shadow by MAC. You guys need this bad boy in your life!
 
 
So this is the look that I have been reaching for, I hope you guys enjoyed it! As always, if you have any questions or requests leave them below.